Cash Drawer Issues
-
RASWIN communicates to any attached cash drawers
through the receipt printer. The printer contains circuitry to
respond to a drawer-open command and a connector to send this signal
to the drawer.
You set the type of printer you have
via the
menu option.
A
drop-down list of the supported printer types will appear on this
screen and you must select the printer type you have installed in
order for the program to know which codes to send to the printer to
cause the drawer to open.
-
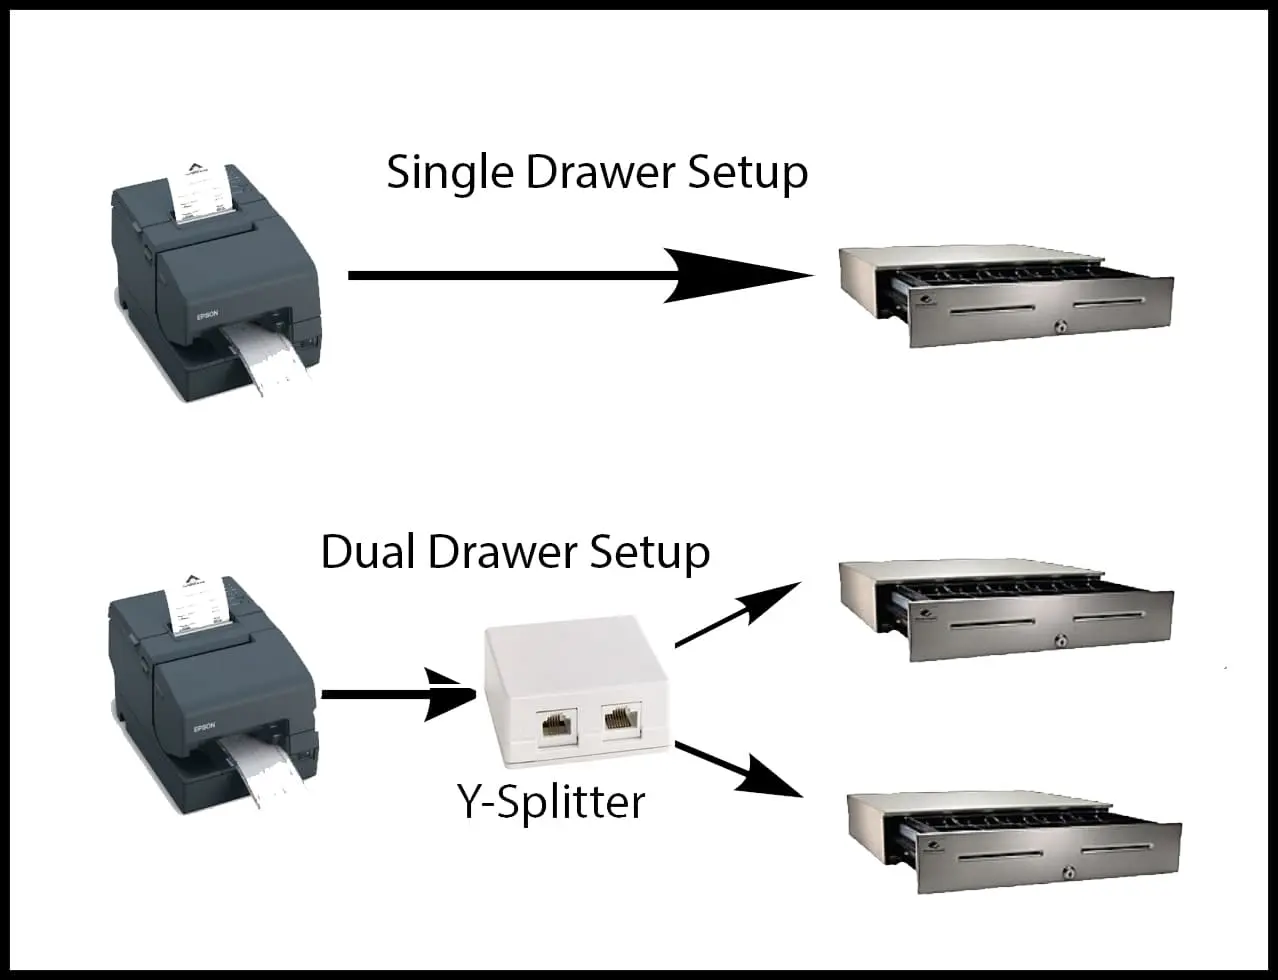
Each user is assigned to cash drawer #1 or #2 via the
cashiers
table. Most of the printers supported by RASWIN can handle two
physical drawers (#1 and #2) so that different cashiers can share
the same terminal and have individual drawers controlled based on
who is logged in. In cases where only one drawer is connected, ALL
cashiers must be assigned to drawer #1 if they are to be linked to
an operating drawer.
It is possible to have a cashier assigned to drawer #2, even if
there is only one drawer attached. In such cases, (e.g, a cashier is
assigned to any drawer other than 1, even though there is no such
drawer attached) the one attached drawer will not open.
-
There is a cable that connects the receipt printer to the cash
drawer. In most cases this is a cable that looks like a standard
telephone cable, but IT IS NOT. You can't use such a cable to
connect the printer to the drawer because a valid drawer cable is
WIRED DIFFERENTLY. Depending on the type of printer setup you have
Quadrant will supply the proper drawer cable. Most of these cables
are marked 'TO CASH DRAWER' on one end . This connects to the
DRAWER, not the printer. The other end, (which may or may not be
marked 'TO PRINTER') connects to the appropriate connector on the
printer. For most printers this connection is labeled DK (for
'drawer kickout').
-
Make sure your network is not capturing the printer port to which
the receipt printer is connected. In such cases, all printer output
will be redirected to a network printer and will not get to the
local parallel printer port connected to the printer. Your login
scripts, if any, must NOT capture the local printer port at any
time.
-
For most printer types, we supply a special Epson printer driver.
For parallel printers, the purpose for this driver is to cause any
Windows 'plug and play' messages to be stopped when WINDOWS starts.
The RASWIN application does not actually print to the printer via
the printer driver. For USB printers, the driver is used and
requires an Epson-supplied driver.
See Setting up your
printer for more details.
-
Each printer type (e.g, TMH6000, TMH5000, etc.) has specific codes
that determine what signal to send to the printer to cause the cash
drawer to open. These will normally be set automatically by the
RASWIN program and should require no manual adjustments except in
the most unusual circumstances. An example of these settings is
shown below (for the EPSON TMH5000/TMH6000).

You should never change these codes unless directed to do so by
Quadrant support.
-
One last thing to check is your drawer switch, which most drawers
have on the front panel. Usually there are three positions : LOCKED,
ON-LINE, and MANUALLY OPEN

Make sure your drawer key is in the middle position (ON-LINE).
-
Under normal conditions if all the above is installed properly the
drawer will open automatically at the right time during receipting
(e.g., if cash is tendered or change is due). It should also open on
demand if the F10 (open drawer) option is pressed from the main menu
screen.
-
If it does not open then, you will need to carefully assess what
link in the chain is not working. This could be your software
settings, the printer, the drawer cable, or the drawer itself.
If you are lucky enough to have a second unit installed that is
working properly, you can simply swap components until you find the
one that is defective or not installed properly. The easiest way to
do this is to simply move the entire printer/cable/drawer setup from
the machine that is working to the one that is not and see if the
problem persists. If it does then there is something wrong with the
computer or setup. If the system now works properly, then you know
the issue is with the printer or drawer or cable.
Depending on which component is determined to be the source,
you can
then further check settings and your computer or start swapping just
the printer, just the cable, or just the drawer to find which
component is malfunctioning.
It should not take long to isolate the problem if you follow
these steps.