
Click for Index
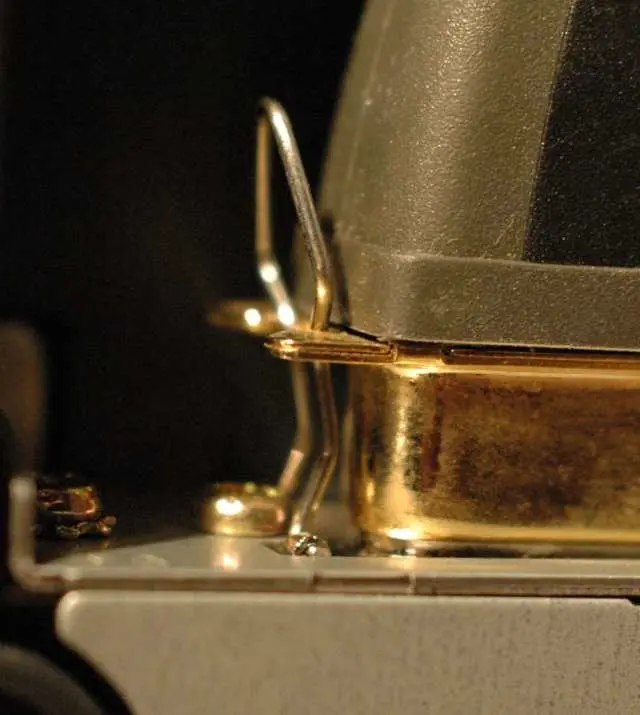
 After plugging in the printer data cable, flip the metal
clips
on each side of the connector up into the sides of the
printer cable plug to ensure that the cable does
not pull lose as the printer is moved around the counter.
The other end of the
printer cable should be connected to the PC workstation
printer connector
on the back of the PC.
After plugging in the printer data cable, flip the metal
clips
on each side of the connector up into the sides of the
printer cable plug to ensure that the cable does
not pull lose as the printer is moved around the counter.
The other end of the
printer cable should be connected to the PC workstation
printer connector
on the back of the PC.
 There are three more connectors to the right of the
printer data cable connector, as shown in the picture
below.
The one just to the right of the printer connector is for
a customer pole display.
This plug will have no connection.
The next plug, labeled DK, is for the cash drawer cable.
The connector
and cable look just like a standard telephone cable. Don't
use a standard
phone cable because it will not work properly and could
damage the printer.
One end of the supplied cash drawer cable should be marked
"To Cash Drawer". This means
exactly what it says. Plug the OTHER end into the DK
connector on the printer and
the end marked TO CASH DRAWER into the cash drawer.
Note: One of the most common errors is
to install this cable with the wrong end plugged into the
printer. The drawer will not
open if it is installed backwards. To add insult to
injury, for a few months a few years ago
we were getting these cables from the manufacturer with
the WRONG END marked "To Cash Drawer".
If your drawer does not open, try reversing the cable,
even if it seems it will be
backwards. We have not seen this problem in some time, but
if you have one of
these older cables this sometimes works.
There are three more connectors to the right of the
printer data cable connector, as shown in the picture
below.
The one just to the right of the printer connector is for
a customer pole display.
This plug will have no connection.
The next plug, labeled DK, is for the cash drawer cable.
The connector
and cable look just like a standard telephone cable. Don't
use a standard
phone cable because it will not work properly and could
damage the printer.
One end of the supplied cash drawer cable should be marked
"To Cash Drawer". This means
exactly what it says. Plug the OTHER end into the DK
connector on the printer and
the end marked TO CASH DRAWER into the cash drawer.
Note: One of the most common errors is
to install this cable with the wrong end plugged into the
printer. The drawer will not
open if it is installed backwards. To add insult to
injury, for a few months a few years ago
we were getting these cables from the manufacturer with
the WRONG END marked "To Cash Drawer".
If your drawer does not open, try reversing the cable,
even if it seems it will be
backwards. We have not seen this problem in some time, but
if you have one of
these older cables this sometimes works.
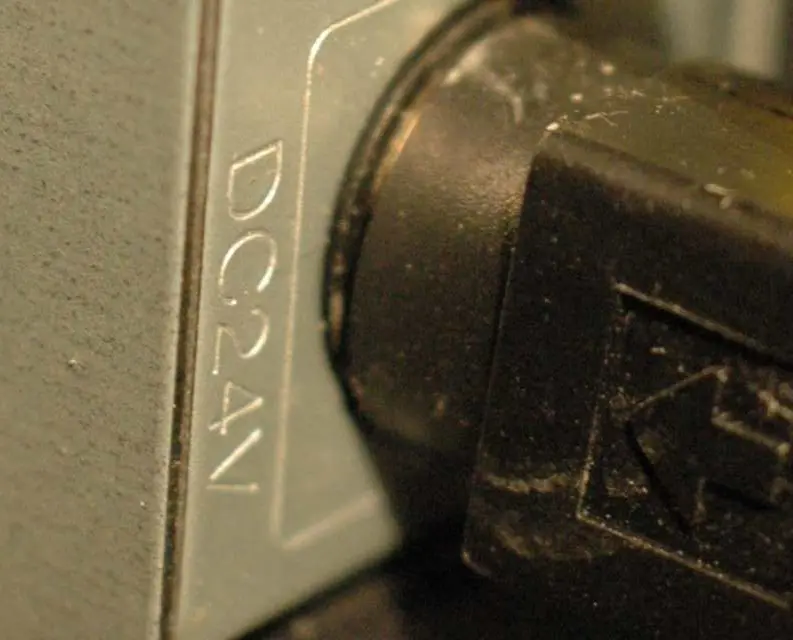
 The connector on the far right is labeled DC24V is for
power supply. This plug
is round and connects to the black power cable from the
power supply.
The connector on the far right is labeled DC24V is for
power supply. This plug
is round and connects to the black power cable from the
power supply.
 The following screen will appear. Click Next.
 Accept the suggested location [C:\Tmdrve] for the files to
be saved. Click NEXT
Accept the suggested location [C:\Tmdrve] for the files to
be saved. Click NEXT
 The program will then extract the files to the specified
directory. Click on FINISH.
The program will then extract the files to the specified
directory. Click on FINISH.
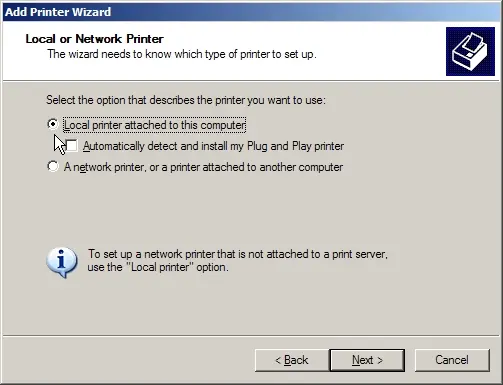
 Since your printer is connected directly to your computer
check the LOCAL PRINTER
option, and uncheck the "Automatically Detect and install
my Plug and Play Printer" check box.
Then Click on NEXT.
Since your printer is connected directly to your computer
check the LOCAL PRINTER
option, and uncheck the "Automatically Detect and install
my Plug and Play Printer" check box.
Then Click on NEXT.
 Windows will normally select LPT1: as the default printer
port as most systems
have only one parallel port installed. Adjust the setting
if needed and then click NEXT
Windows will normally select LPT1: as the default printer
port as most systems
have only one parallel port installed. Adjust the setting
if needed and then click NEXT
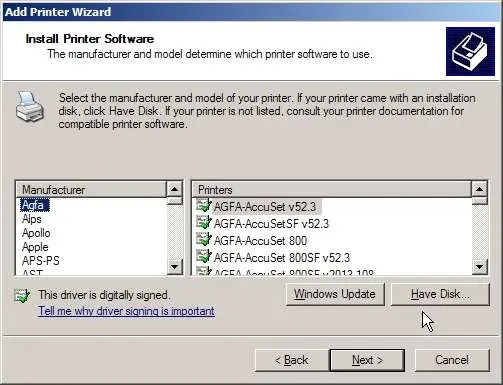
 On the next screen, check the HAVE DISK option.
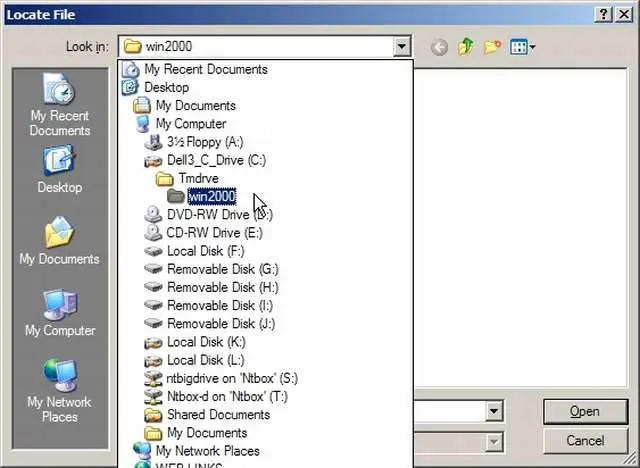
 A file browse window should appear. Navigate to the
c:\tmdrve\win2000 folder (use Win2000
even if you are running XP). Double-click on The WIN2000
folder.
A file browse window should appear. Navigate to the
c:\tmdrve\win2000 folder (use Win2000
even if you are running XP). Double-click on The WIN2000
folder.
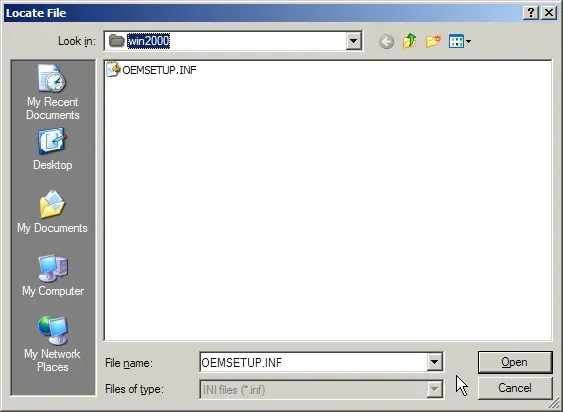
 The following screen should then appear. Click on OPEN.
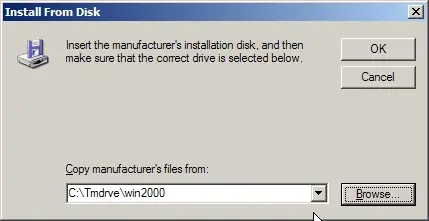
 Click on OK.
 Then a list of printer types will appear. Select the
TMH5000II (Partial Cut)
open, and the click on NEXT
Then a list of printer types will appear. Select the
TMH5000II (Partial Cut)
open, and the click on NEXT
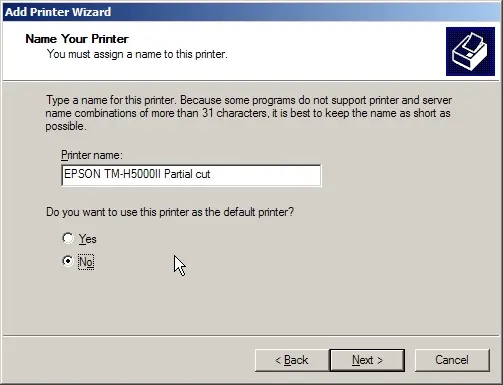
 Leave the suggested printer name as is. Click on the "NO"
option (this will NOT
be your default Windows printer), then click on NEXT
Leave the suggested printer name as is. Click on the "NO"
option (this will NOT
be your default Windows printer), then click on NEXT
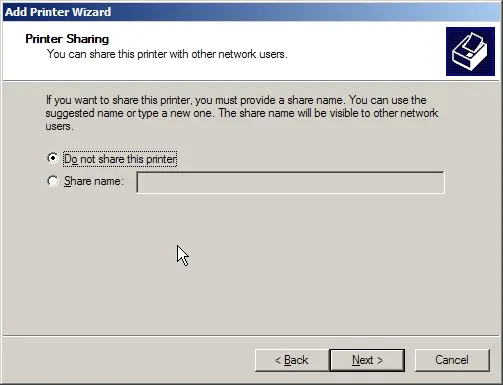
 Click on the DO NOT SHARE THIS PRINTER option and then
click NEXT
Click on the DO NOT SHARE THIS PRINTER option and then
click NEXT
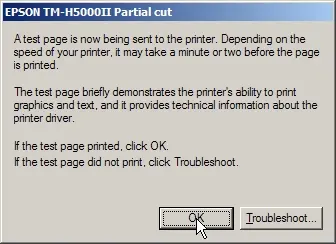
 The system will then ask if you want a TEST PAGE. If you
indicate that you do
you should see a screen similar to this one.
The system will then ask if you want a TEST PAGE. If you
indicate that you do
you should see a screen similar to this one.
 That's it for setting up the printer driver.
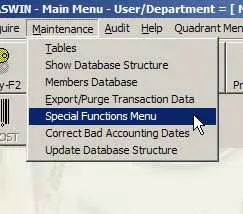 On the left side of the screen you will see several
options related to your
printer.
On the left side of the screen you will see several
options related to your
printer.
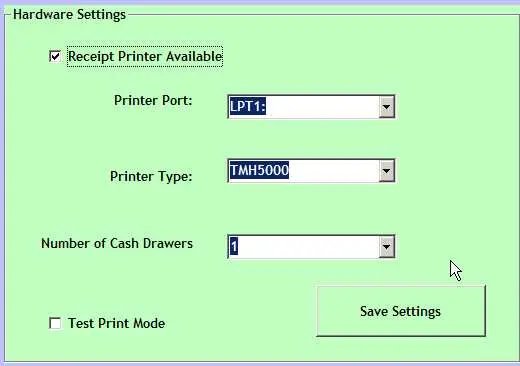 Make sure the RECEIPT PRINTER AVAILABLE box is checked.