Quadrant Systems RASWIN - Release Notes 2019
1.0.6001 2026-02-04 13:00
21-Nov-2019
-
A recent changed to the way the cashier user ID
images (displayed in the lower right corner of the main menu
screen) are handled did not work for some of our clients. The
change was to store the images in the RASWINSQL database so that
the same image would appear on all workstations without having
to physically place the image file in a shared directory or on
the local workstation. On our test systems (Windows 10, 64bit)
this function works you are having difficutlty with this we or
storing/retreiving the images, there are two options to try:
Try manually registering the
MSBIND.DLL
control. This DLL is installed with the RASWIN setup
program,
\Windows\SysWow64
directory.
If you don't find it there, then looking here:
C:\Program Files
file, navigate to the location where the file is
and open a command windows and type:
regsvr32.exe msbind.dll
then press ENTER.
As an alternative to storing the images in the database, we
have modified the program "back" to allow an option to store the
images in a shared directory or onl the local drive. By default
the program will try to use the DATABASE storage method, but you
can easily change this option. This can be done on the image
selection screen:

In the lower right there is an option to select whether
your files are stored in the shared database, or via your
"FileSystem" (which can be the localhard drive, or a shared
network location.
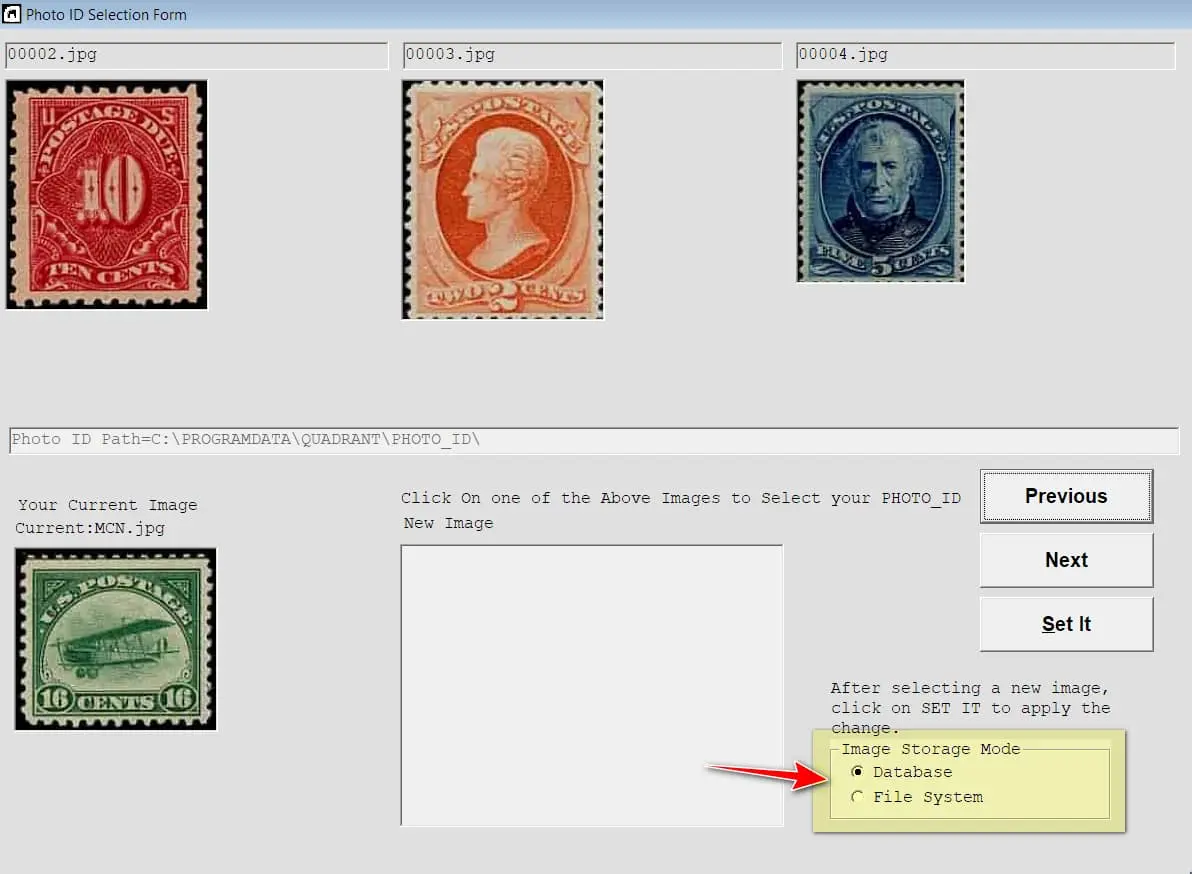
If you elect to use the filesystem option you will need to
tell the program what directory to use via a new MISCPARMS
setting:
PHOTO-ID-PATH.
The default setting is
C:\PROGRAMDATA\QUADRANT\PHOTO_ID\.
If you want to place all the files in a shared directory,
you can use a mapped drive
\\FINSERVER\QUADRANT\PHOTO_ID\.
18-Sep-2019 14:06
-
A small change has been made to the Payment Entry
screen. The Payment Method drop-down list now shows the METHOD
and DESCRIPTION within the drop-down area. Older versions showed
only the METHOD.
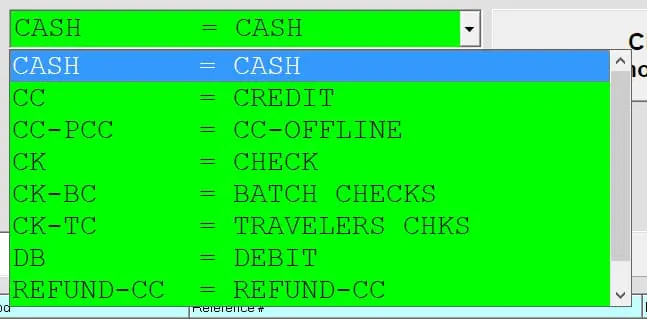
It will automatically line up the values into two columns
for ease in reading. If the drop-down list is two narrow or too
wide as displayed on your screen, you can adjust a setting in
the PMT-DROP-DOWN-LIST-WIDTH. Set the
value higher or lower as needed. The default setting is 600 which we found to be a good starting
-
A new option to control what data appears in the
payments section of the customer receipt has been added.
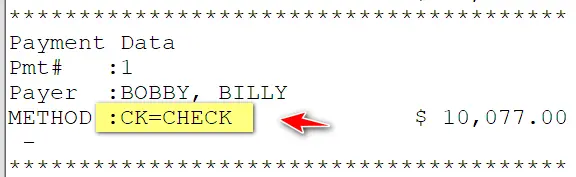 The
text that shows on the receipt is controlled by a parameter you
can adjust to match what you want to have shown. The MISCPARMS table setting is D to display only the DESCRIPTION, or MD to display both the METHOD and DESC
The
text that shows on the receipt is controlled by a parameter you
can adjust to match what you want to have shown. The MISCPARMS table setting is D to display only the DESCRIPTION, or MD to display both the METHOD and DESC
11-Sep-2019 10:58
-
When you start a new receipt, the RASWIN program
checks the database to see what the largest receipt number
currently on file is, and adds 'one' to it to determine what the
next receipt receipt records are inserted into the database for
each of these entries, then at the end of the process a receipt
header is added that ties all the detail and payment lines
together using a power failure or network disconnection before
the header record is fully updated) detail line item records or
payment records could be "left behind". We have ajusted the
start new receipt function to insure that in such cases any
stray detail line items or payment records are deleted. The
updated version of the automatically program creates 3 new SQL
server stored procedures to do this.
-
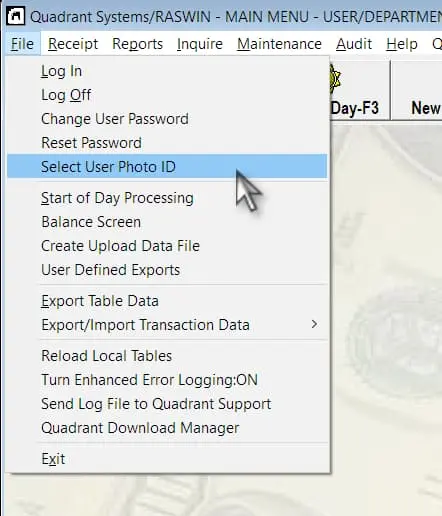
The RASWIN program now stores the user photo-id
pictures in the RASWIN database. Photo ID pics (in JPG format)
can be selected via the File Menu.
The setup program will install a set of images that you can
select from into the C:\programdata\quadrant\photo_id directory.
These are all sized to be about 200x200px. You can also use
other JPG files, but we recommend that you use a photo editing
program to insure the size of the image is more or less square
and 200x200px or so. There is an online tool available to do
this. at this web link: https://squoosh.app/.
You just need to drag
your image to the screen and use the settings panel on the right
side of the screen to adjust the size and quality. In most
cases, a file size of about 8k to 10k can be used, which will be
a substantial reduction in size from a typical cell phone image
without a significant reduction in the quality of the image.
Once you have sized your photo correctly, just copy it to the
above noted directory and the program will then find it when you
use the "select photo id" option, as shown below.
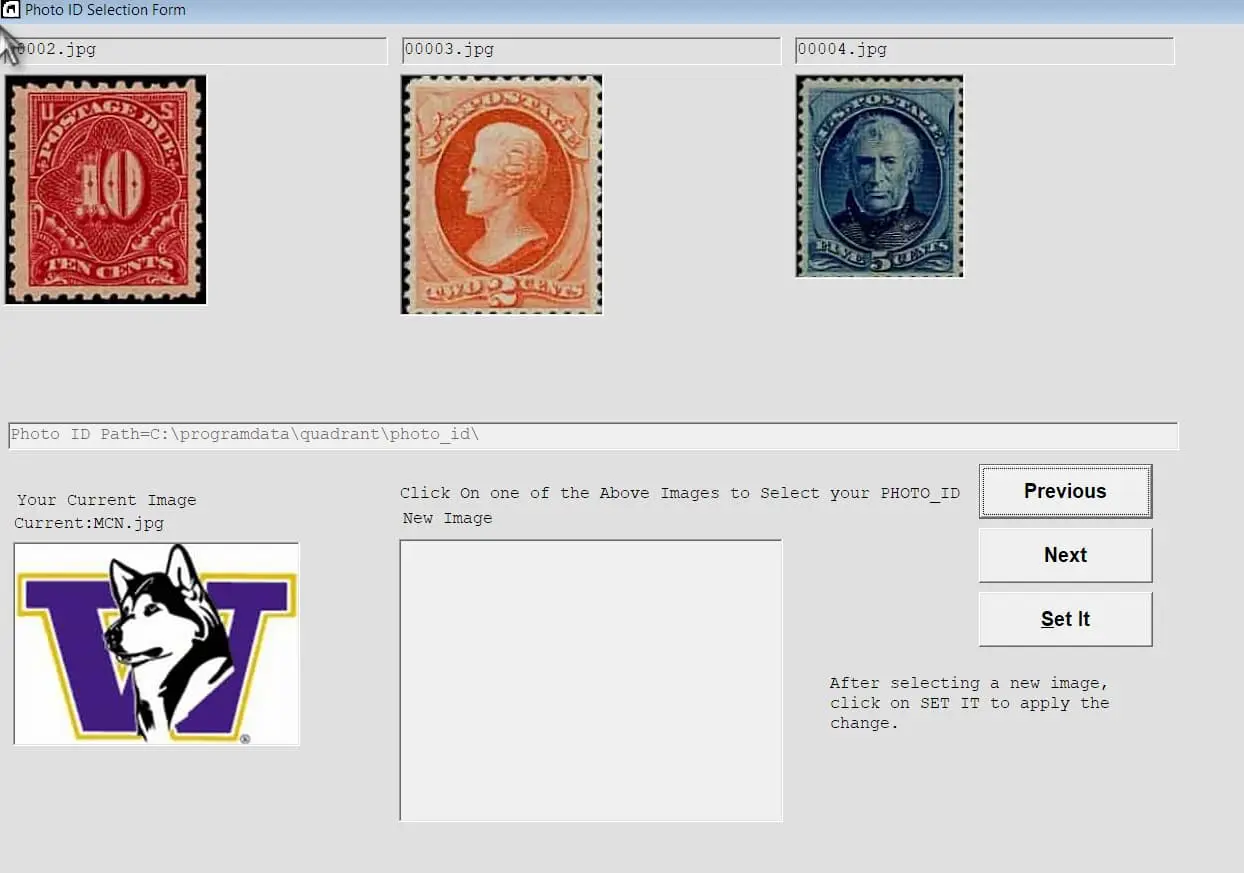
Use the Previous and Next buttons to move between the
available photos. When you find one you want to use, click on
the SET IT button, and the progam will save your selected image
to the database, using your login ID as the record identifier
for you image. Once this is done, that image will be used on ALL
workstations running the RASWIN program, unlike the older
versions of the program that required the image to be on each
machine.

11-Jul-2019 11:08
-
The REGSET.EXE program has been modified slightly. It
now will make an automatic entry
in the LICENSE table in the DEPT_CODE of your choice when you
use the "SET" button to assign the
register number. This will eliminate to make a manual entry for
a new workstation with a new
register number.
Please see this link for details on this
updated version of REGSET.EXE
-
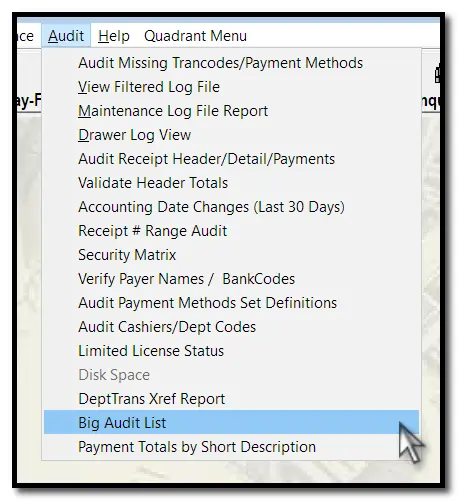
A new report has been added to the Audit Menu. This is called
"Big Audit List".
From the Audit Menu, select the option:
And then your date range:

Wait a few seconds and the report will be generated and
displayed in your default
web browser. Note that this set of reports relies on the various
transaction records
and corresponding views. If you have deleted unused trancodes,
removed cashiers, payment
methods, etc., these views will not reflect the underlying
transaction data, so some totals
may appear to differ in different sections of the report.
Also, For the totals by payment
method (last section of the report) any change given out is not
factored in the the total
displayed for cash tenders.
A lot of the information shown on this report is available in
slightly different format
on the various sections of the cash recap report.
22-May-2019 15:23
-
The cash recap has been modified to include extra information
about the accounting dates,
calendar dates, in addition to the minimum and maximum receipt
numbers which were
previously displayed.
This section of the report will be included on the report if you
select the TOTALS BY TRANCODE
option via the checkboxes below the other selection criteria.
See the example below.

17-May-2019 10:33
-
The logic related to selection of transaction dates, and the
other options such as
register, user, and department has been reworked to ensure that
the same criteria are
used for each selected section of the report.
Also, based on the date range selected (either accounting date,
or calendar date, or both)
the drop down lists will only permit you to select either "ALL"
or the users, departments,
or registers that actually processed transactions in the
selected range of dates.
13-Feb-2019 9:34
-
Adjusted login logic so that if the user logs off, all menus and
command buttons,
except the SECURITY and EXIT buttons are turned off.
-
Password length has been increased to be up to 30 characters.
The needed database and
table adjustments will happen automatically the first time the
current version of the
program is run and requires no action on your part.
The longer password allows you to enter a phrase or sentence
that can be easier to remember
than a short but complicated password.
Existing restrictions related to passwords are still in effect
as regards to minimum length,
password complexity, those contain your name or user id, etc.
are still in effect.
11-Feb-2019 11:48
-
A new report has been added to the AUDIT MENU as shown below
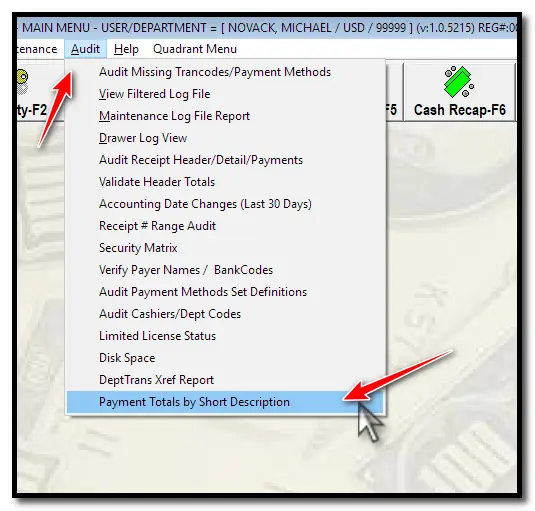
This allows you to create a quick listing of totals by payment
method based on the special
SHORT_DESCRIPTION field on each
TRAN_CODE in the
TRANCODES table. These are used for
special
reporting purposes. For example, if you want to use the QUICK
REPORTS function to list all
receipts that are related to a certain class, such as TAXES or
BLDG, you can set
the
SHORT_DESCRIPTION to be
/TAXES/ or
/BLDG/.
When you select the new report the following screen will appear.

Simply enter the values you want and click on the GET DATA
button and the system
will quickly display the values it finds.
If you have mutilple registers to check, just enter a forward
slash between the
three digit register numbers.
The data can be printed on your receipt printer or report
printer.
After running the report and closing the screen, the settings
you used will be
saved automatically for the next time you run it.
The values on this report are not guaranteed to be 100% correct
but will be very close
to the actual figures. The reason for this is that in cases
where multiple forms of
payment are tendered on a single receipt, it is not possible to
know how they are to be
broken down across the detail items on the report. For example,
if you had a BLDG item
for $100, and a TAX item for $100, and two payments, one check
for $150, and cash for $50 ...
we can't know which of the two items should get $100 of the
check and which would get $50 ck and $50 cash.
So the report may slightly under or overstate the totals in some
cases.
There's no way around this.
On the bright side of things, this does not happen very often in
the real world.